What you need:
Simplicity pattern 2609
1 1/2 yards of sparkle fabric
1 yard of elastic, at least 1 inch wide
Black thread to sew on the elastic
Colored thread to match your sparkle fabric
It took me a while to find a pattern that I could get to work. I actually had my mom look for patterns as well since she is an amazing quilter/seamstress. The best pattern I found that I could get to work was the Simplicity Pattern #2609. I purchased it at Joanne's for around $10.
The only pieces of the pattern that you need to use are numbers #1 (the yoke) and #2 (the first tier). I made copies of both pieces so that I will have a spare.
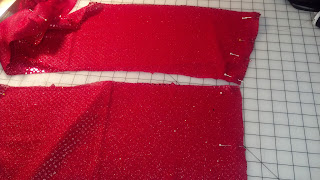
First fold your fabric in 1/2 with right sides together and place your two pattern pieces along the fold. Pin in place and cut out. You will need to repeat this step. Once you have cut out your pieces you should have two #1's & #2's.
 |
| Fabric folding in half w/ pattern pieces #1 & #2 pinned in place |
 |
| #1 & #2 cut out. You will need to do this twice so you will have four pieces total |
Pin your two #1 pieces together inside out, lining up your arrows on each end. Repeat for both of your #2 pieces. Remember to align the arrows on each end. Sew each of the ends together using your colored thread for both the #1 and #2 pieces. I sewed a 1/4 inch seam, I think that the pattern calls for a different seam width.
 |
| Pieces pinned together, inside out- remember to align the arrows and the end of the fabric |
Next you want to turn your #1 piece right side out, but leave your #2 piece inside out. "Stuff" your #1 piece inside of #2. Your two fabric pieces should be sparkle to sparkle. Align the arrows on the top seam and pin. Next pin your #1 & #2 end seams together. From there systematically pin the rest of the fabric in place. Yes, there is a lot more of the #2 fabric to work with, but it is okay.
 |
| #2 inside out, stuff #1 inside right side out |
 |
| #1 inside of #2 |
 |
| Pieces pinned together |
 |
| Skirt before trimming any excess off |
 |
| I cut about 2 inches off of the top |
After you have pinned the elastic on slowly sew around the top of your skirt attaching the elastic. Make sure that you are sewing onto the sparkle fabric. It works best to hold the elastic tight from the top and bottom so that the elastic will stretch over the fabric as you sew.
Once you have sewn on the elastic you can trim any excess sparkle fabric off on the inside of your skirt.
Your skirt should look like this once you are finished:
 |
| Modeling my finished product (yes my mom is putting that quilt together in the background) |
 |
| You can also use spandex fabric like the pink skirt that I made a while ago |
HAVE FUN!!!! Let me know if you have any questions...
--Tasha


Awesome! I look forward to finding the pattern and trying this out. My best friend has taken up running and has run 2 marathons at Florida Disney! I can't wait to surprise her with one of these!!! :)
ReplyDeleteThanks for your directions! I made one today...well almost done, need to get the elastic to finish it off. I'm folding the top down and adding 1" (I think) on the inside. I also took quite some time on the pleats. I matched up the arrows and pinned, then I found the middles and pinned, then found the middles of those and so on and so on. I'm a tad bit anal when I do things, can't do it randomly, ugh! But I love the pattern and can't wait to make more!!
ReplyDelete